Site Map
Current Week
Daynotes Gang
Orb Designs Test Labs
Debian 2.2 Rev 2 Installation Page One
 Email Brian Bilbrey
|
Orb Home Site Map Current Week Daynotes Gang |
Orb Designs Test Labs |
 Email Brian Bilbrey Email Brian Bilbrey
|
OK, here we go again, with an installation of Debian 2.2 Rev 2... Stay tuned to this space - it'll be full of pictures and text shortly...
Day II revision - I've broken this up into pages: One, Two, Three, Four. Hope this helps!
Let's try again: Based on an idea from John RIcketson, broken into pages with images big enough to be useful in most cases. Larger versions are linked. (2/19/2001)
At least we're full of pictures. There's 111 screen shots accompanying this report - All the thumbnails and full-size images are PNG files (plus one JPG). The full size images, with the exception of the large (147K) closing image, are all less than 25K, and they open in their own separate window, automatically. Be warned.
The screenshots are real, taken by KSnapshot v0.4.1. The host system is Mandrake 7.2, Debian (as a guest OS) is installed in VMWare 2.0.3 build 799. I got the ISO images via LinuxISO. Have fun - I did.
Debian is often referred to as the purist's Linux. It is a non-commercial distribution, although some commercial distros (explicitly Corel) have based on Debian. There are a variety of unique features that make Debian stand out for me:
APT: APT is the front end for the package management system used by Debian. Apt is one of the nicest pieces of software I've ever worked with, flexible yet rigorous. The information "contained" in the Debian package format (files that normally terminate in .deb) facilitate the best dependency checking and conflict resolution I've experienced. If two or more packages provide identical functionality (ie: Sendmail, Postfix or Exim: all MTAs), then only one may be installed at a time. Whoo-hoo! Apt can be used to install from local disks, CDROM, over NFS mounted drives, via the Internet... the list is impressive. Highly recommended.
Selection: There are lot's of choices. The main binary distribution on CDROM (just binaries, not many sources to speak of) runs to three full disks. I have read of people lamenting the plethora of choice. My response there is FEH! Choice is good. At latest actual count, there are over 4000 packages that are Debian formatted. Sure, there's overlap - that means more choices... Cool.
LSB-FHS Standards Compliance: According to the interim test results at the Linux Standard Base, Debian is currently running second only to Suse in compliance with the Filesystem Hierarchy Standard portion of the LSB. Theoretically, LSB compliance will mean that more applications will run without problems, down the road.
Conservatism: Among the local admins and Linux afficionados, Debian is well-loved as a stable and conservative choice, especially on the server. There are many in my local LUG that use Debian on the desktop, I have from time to time, on a variety of hardware. The kernels are not bleeding edge, the C-compiler is rated to build kernels, the bugs are fixed, and security upgrades are a snap. Debian goes front and center on my server-only boxes.
Opportunity to learn: Yeah, Debian is challenging, but look at challenge as an opportunity to learn more about your system and about Linux. In a way, it's funny that the winner of the Brain Dead Simple install contest (Corel Linux) is based on the most complex, non-GUI distro around - Debian. Learn Debian and understand Linux and your computer far more, far faster than with any other distro... or drown, of course, because Debian is at the deep end of the Linux pool.
The Debian Social Contract: You should follow that link and read the whole thing, but I'll quote you the first paragraph - it's central to the philosophy behind the distro... "Debian Will Remain 100% Free Software We promise to keep the Debian GNU/Linux Distribution entirely free software. As there are many definitions of free software, we include the guidelines we use to determine if software is "free" below. We will support our users who develop and run non-free software on Debian, but we will never make the system depend on an item of non-free software."
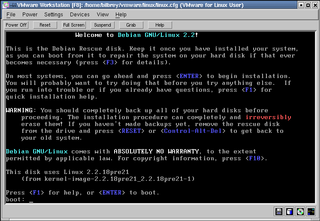 OK, enough evangelizing - you're here to see a Debian install, I've done my best to provide such. It'll take me a couple days to fill out all the text around the pictures, but you'll get the idea of the flow of things with just the images. There's no GUI for installation, just a nice blue and gray textmode menu setup that leads you through the install. So let's get started!
Most systems in this day and age allow booting from the CDROM. VMware also permits this, which makes my job considerably easier, to start with, anyway. The first shot above (left) is the initial boot screen as presented by the Debian i386 Binaries, Disk 1. Fundamentally it boots with the disk image from a Debian rescue floppy, then performs some contortions to turn into an installation system. The usual pre-installation warnings come, in RED even, telling you of the possibility of irreversable damage to existing data and configurations and telling you to back up your data and software as necessary to recover from a disaster. DO IT!!! If you don't keep backups anyway, you're doomed and just marking time, whether or not you're about to install a new Linux distro. KEEP BACKUPS!
Other options for installing Debian include downloading five or fewer floppy disk images from the appropriate repositories on the Internet (like this one, for example). These allow you to boot, initially configure your system and network connection, then install Debian across the internal or public network. My first Debian install was Internet-based. It took some time to get right, but worked just fine. Remember that when installing a distribution, by the time disks are "set", much less pressed and distributed, the state of the art has moved on. You'll be upgrading your software once the install is complete.
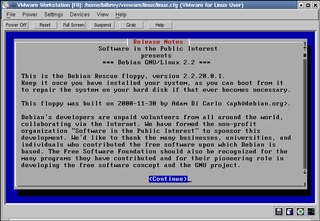 In this case, press Enter to begin the installation. The kernel and initial ram disk both load, then the installer starts up. An initial ram disk (aka initrd) is used because until partitions are defined and mounted, programs and data loaded on them, and the system booted from that perspective, there's no there, there, as it were. All the partitions we define are mounted in the filesystem tree defined in the ram disk, and the software is loaded into those partitions. The first boot after installation is what brings it all to life.
This second screenshot is the introduction to the Debian system and installer. This is also your first exposure to the installer proper. The primary keys used to navigate this structure are TAB, the directional (arrow) keys, and Enter. On scrolling screens, like this one, use the up and down arrow keys to navigate the text. Read everything - you don't know when you're going to need it.
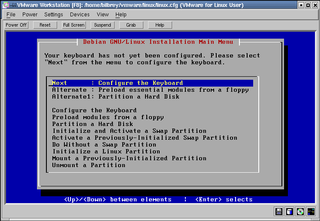 Following the introduction,we head into installation proper. The default next step is always highlighted, whenever you return to the Debian GNU/Linux Installation Main Menu. You needn't take the one choice, you can select alternates, or go back through steps that have already been completed (in some cases... partitioning again after loading software is ... silly, for instance).
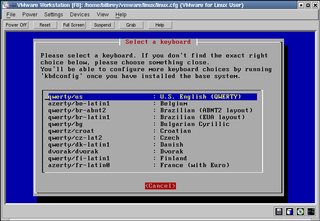 The first installation step is to configure the Keyboard. This seems trivial, but it sets the keymap that helps the installer understand your keyboard. Needless to say, I chose the default, which is typically US English (aka qwerty/us). Note that this is not keyboard configuration as used in the X-Windows setup - that's done much later.
Once the keyboard is setup, it's straight into the deep end. Partitioning is at the front end of the Debian installer. This makes sense in a lot of ways, as there's no GUI stuff to set up first, and most things can't really progress until there's someplace to store your programs and data on disk. But it can seem a bit sudden.
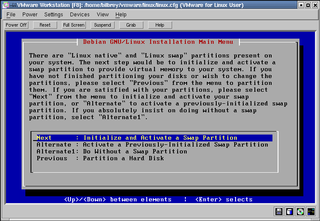 If you've already got a functioning Linux setup, then Debian probably detects that there's a swap file present, as the screenshot to the left shows. However, we're going to operate on the assumption that we're starting with a blank disk (so I blanked the disk, and started over). This brings us to the Partition a hard disk selection, in the following section...
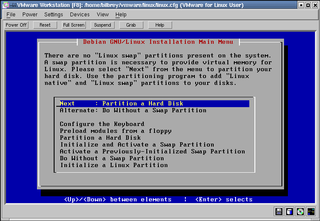
The alternative to Partition a hard disk is to Do without a swap partition. While this seems like an odd pairing, it merely reflects the first requirement from a partitioned drive - Debian wants you to set up a swap drive. If there are Linux partitions already on the system, Debian detects them (as previously noted), and asks to initialize them. Here, we'll set up the simplest partitioning scheme possible: a single swap partition, and the rest of the space devoted to a single large root.
 A couple of notes about partitions. First, let's talk about swap space. Linux treats swap as large, slow, secondary main memory. RAM "pages" that are inactive may be swapped to disk to make room for the code or data of an actively running program. The original rule of thumb for selecting swap space is to take your physical RAM size, double it, and create a swap partition of that size. Of late, the informal response to that statement is, "Well, yeah, but not really, I've got 128 (256 or 512) Meg of RAM. I really don't need more than my RAM size..." With the release of Linux 2.4.0, Linus recommends returning to the rule of thumb. He notes that 2.4.0 makes aggressive use of swap, and that if you have lots of RAM, then you should be able to afford enough disk to have 2X swap - disk is cheap! OK, Linus... Heh.
Beyond that, there are other considerations: If I have two or more spindles (separate hard disks), then I like putting swap on a partition that isn't on the same drive as my root (/) and /usr partitions. This cuts down on thrashing and improves throughput considerably. Otherwise, I tend to put swap up front on small drives, or between the program and data partitions on large drives, to lessen seek times.
Next, I have a couple of personal preferences for partitioning schemes that I'll inflict on you once again (and again, and again, heh heh heh). The following is my standard setup for large single drives, 10 Gig and up, in order of creation, from the beginning of the disk. The stated partition size is given in front. If I have a modified size for server configs, then I'll put that number in brackets. So here goes:
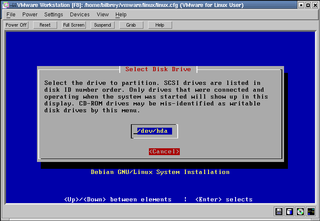 OK, ok. Enough advice, back to the Debian installation. We select Partition a hard disk, and the next screen instructs you to then you'll select a disk drive to partition. In our test case here, there's only one possibility, but every physical disk in your system will be listed. Remember that drive C and D have meaning in DOS and Windows, but none here. /dev/hda is the Primary IDE Channel, Master, hdb is Primary Slave, hdc is Secondary Master, hdd is Secondary Slave. Sometimes recent non-disk devices like CD writers may show up on the list of partitionable devices - don't be fooled. Many systems are configured with a single large disk at hda, and a CD-type device at hdc. But know your own system. On Grinch, I have the following setup: a 52X CDROM at hda, an HP burner at hdb, 20G at hdc (boot drive) and 15G at hdd. SCSI devices show up on the list in chain order, /dev/sda, sdb, etc.
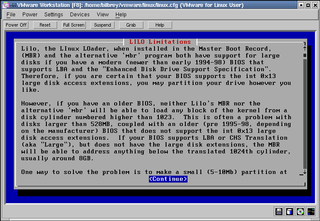 The next screen after device selection yields a dissertation on the Lilo boot loader, its limitations, and the restrictions that places on the partitioning scheme. The limitation is that older Lilo, or any Lilo on older systems (pre 1995-8 or so, in BIOS age), can't boot from partitions that are located beyond the 1023rd physical cylinder. This is because the boot program keeps track, for space saving reasons, with a 10 bit number (0..1023). Newer BIOSes that have large disk support, and the latest version of Lilo, can happily boot from anywhere on a disk. That said, I still prefer to make a relatively tiny boot partition and put it right up front. Makes things easy to debug - Lilo can't be the problem if the Linux kernel is contained in the first 10 cylinders, eh?
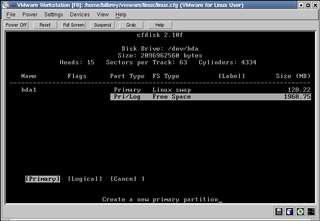 Having selected the device to partition (and in a multi-disk configuration, you may choose the Partition a hard disk option as many times as you have devices), you'll be thrown into cfdisk. This utility is fundamentally similar to the old DOS fdisk program, only it knows about a lot more partition types. See the cfdisk manpage for far more details. Use NEW to create partitions, TYPE to make one swap partition, BOOTABLE to make your /boot or / partition bootable, and WRITE to commit your changes to disk. Repeat for each device.
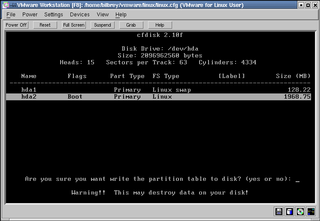 NOW FOR THE IMPORTANT ADVICE - Having previously made your mind up about your partitioning layout prior to this step, take notes about which partitions (say, /dev/hda2 or whatever) are going to be associated with which mount points in the filesystem. Unless you're very good, you'll forget between partitioning and designating the mount points, and it'll make you crazy. Keep good notes - it'll help in the long run.
(none) <<-- Previous Page ***<<<ONE>>>*** Next Page -->>