Software :: Hardware :: Network/Basic
Network/Advanced :: Security and Users :: System :: Misc ::
Network/Advanced
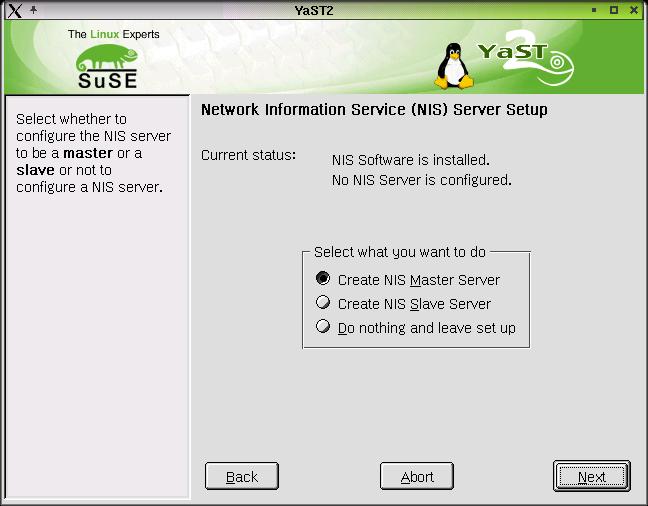
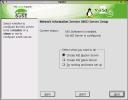 Configure NIS Server occupies the upper-left spot under Network/Advanced. One might presume that this placement indicates it's importance, and likelihood of usage. Ahem. Not really. NIS is a network authentication client/server rig. It used to be called Yellow Pages (or Sun Yellow Pages), and the app is
 yp. Fortunately for us, Yellow pages is a wholly owned trademark of British Telecom plc, the people who apparently also claim to own linking, and thus the World Wide Web... but I digress. For more information about NIS and it's bastard cousin, NIS+, I'd recommend that you start with the NIS-HOWTO on LinuxDoc. There are admins of large systems who use and administer NIS. I've heard most of them reduced to helpless giggling by the mention of NIS+. It's your call. I don't know anything about NIS, and don't have a demonstrable need, so I'll pass. That accounts for the NIS client and NIS+ Client modules, then, too. If you have the skills to evaluate these, please drop your comments in the suggestion box.
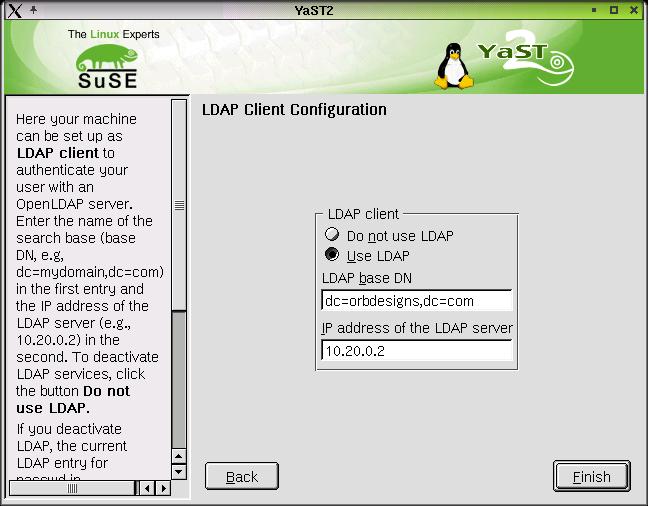
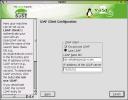 Setting up an LDAP client is only pertinent if you also have an LDAP server that you've configured to do authentication over the LAN for you, somewhat similar to NIS. LDAP stands for Lightweight Directory Access Protocol. LDAP client equipped machines can be configured using NSS and PAM to authenticate against an LDAP server for such services as login, resource permissions and so forth. Configuring such a server is the topic of the LDAP-HOWTO, and outside the scope of this document. This is yet another thing I've never done, but I intend to configure an LDAP server one of these days soon. It's useful for a variety of shared-access data - like address book information that Marcia and I can share from our various platforms. More on this subject at a later date.
 OK, let's actually use something from this section. It's even driving me crazy that I haven't done some things, much less everything. The NFS server module starts off by asking me whether to start or stop the NFS server.
 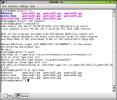 Nothing about configuration yet - I need to select Start then click on the Next button. Once there, I can configure directories, and the hosts that are allowed to access them, and the permissions that are granted. Type
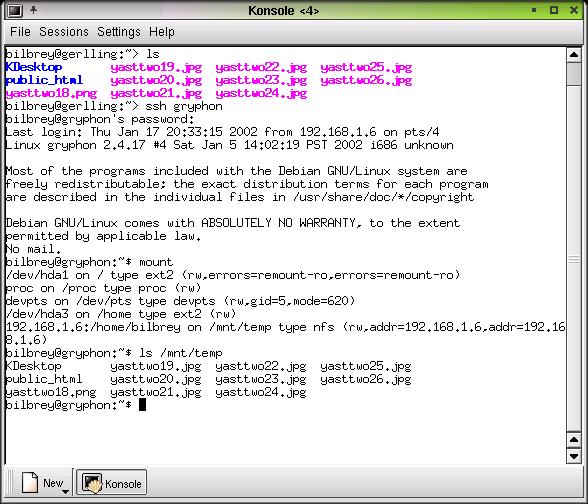
 man exports in a terminal window to get the nitty-gritty. For this example, I'll just share out my home directory, and give permission for it to be used over on Gryphon the laptop. At right, you can see a terminal window screenshot. Over on Gryphon (my Acer Travelmate), I've already mounted the NFS share on /mnt/temp. In the terminal, you can see that I've listed my directory, then used OpenSSH to access Gryphon. Typing mount, I show that the share is mounted via NFS. A directory listing of /mnt/temp shows the contents of my local home directory, from the over-there perspective. Yes, there are ways to limit access by UID and GID as well as from explicit host or subnet specifications. However, NFS traffic isn't (to the best of my knowledge) encrypted, nor is an NFS server a safe thing to run on an edge box (that is, directly connected to the Internet). Keep NFS behind the firewall, period.
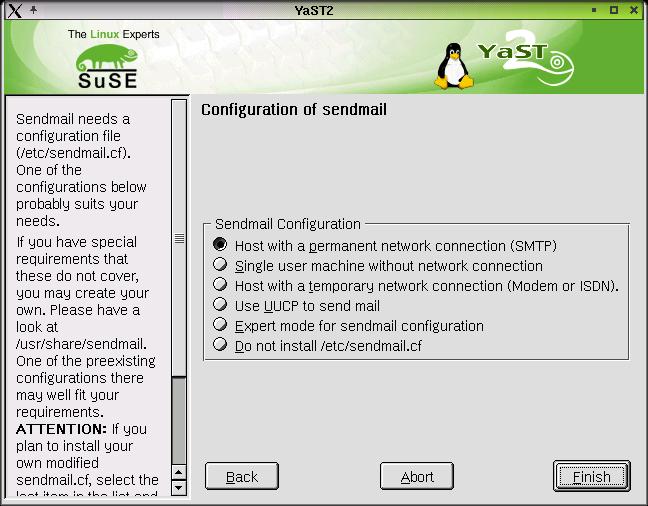
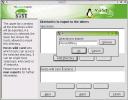
Sendmail configuration - Here's what most people need to know about Sendmail (or any of the MTA competition: Postfix, Exim, Qmail and others): If you don't have MX records pointing at your server, then you shouldn't run an MTA. I'll explain in a moment, but if you don't already understand that last sentence, then don't run sendmail.
This is the drill. Most people connect to a mailserver on the Internet both to receive (mostly via a POP3 protocol connection) and send (via a "SmartHost" or other mail server). These machines aren't local to you, you neither configure nor maintain them. All you have to do is setup the right machine names (or IP addresses) in your mail client. If this is the case for you, then running a local mail server increases your vulnerability without giving you any added value - you simply won't use the features provided.
 Now, if you do need to run a mail server, then perhaps you're set up like I am: I've got 4 domains, all of which have MX records which point to my main server. I run an MTA to receive this mail, and either deliver it locally, or send it on to it's final destination in a few very restricted cases (NOT an open relay). In my case, I'd start off with the first configuration from the list in the dialog: Host with a permanent network connection. Then I need to tune it, of course, to meet my specific needs, including mailing list management, virtual domains, and a host of other options. Working with Sendmail, your friend is the "Bat Book" - Sendmail from O'Reilly. Get it and read it.
The other selections are as follows: Single user machine without network connection - Ummmm. What's the point? Hmmm. Host with a temporary network connection (Modem or ISDN) - diffferent configuration, especially in relation to queues, error and delay messages and such. A number of such setups are run in this way, including hosts of some of the most interesting mailing lists I belong to. But again, not for the faint of heart. Use UUCP to send mail - a legacy option that's still used in a few educational institutions that run over UUCP, rather than IP networks. Expert mode for sendmail configuration - Don't be fooled, this leads to a few questions about how Sendmail is configured and started up. It's only the beginning of a custom MTA setup, and you can do evil things with a mis-configured Sendmail installation. I tell you three times! Do not install /etc/sendmail.cf - Well, I sort of expected this to shut down Sendmail. That's not the case. I don't want Sendmail running - I don't want the worry of an open unneeded service. I'd uninstall it. However, several other required packages are dependent on some form of local mail transport agent.
To disable sendmail without removing it, first go to YaST2 -> System -> RC-Config Editor, then from the sidebar, choose Mail -> Mail-basics. Set SMTP to NO, then click the Save button to start the reconfiguration process (which can take a few minutes). Finally, ensure that any previously running version of sendmail is shutdown by typing /etc/init.d/sendmail stop as root.
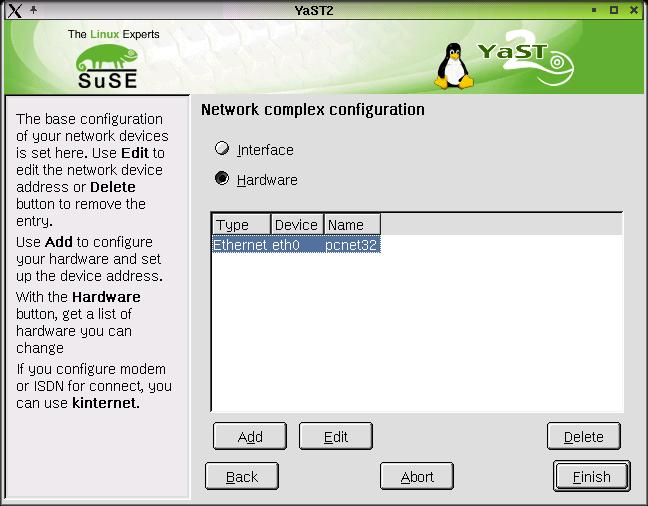
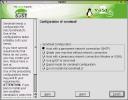
 Expert network configuration (shown at left) opens a dialog box with the daunting moniker of Network Complex Configuration. There are two faces to this setup tool. They are interface and hardware.
 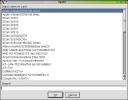 The latter permits modification, addition or deletion of physical interface devices like NICs, Modems and ISDN cards. One very nice feature that YaST2 brings to this table is the ability (thumbnail to the right) to select card drivers from a list of real product names such as 3Com 3c59x/3c90x, rather than the more cryptic kernel driver names like vortex.o. However, the seach box only works from the front of the strings, so knowing that "tek" is somewhere in your card's description doesn't help. The interface selection section is identical to that from Networking/Basic, so there's no use going over this ground twice.
You'll find yourself working with Expert network configuration only if you change hardware, or didn't do the network configuration steps during initial installation of SuSE 7.3. Like many other tools, there's significant overlap with other modules that fall into YaST2's domain. But if multiple means to a single end permit more people to configure their systems, that's all good.
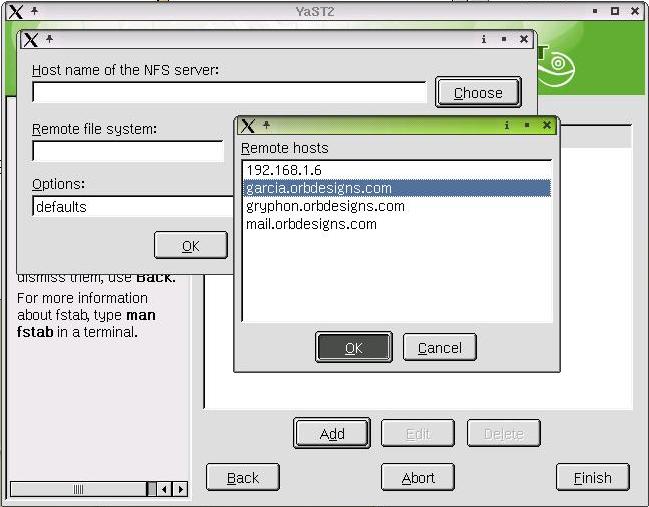
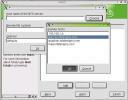 NFS client provides functionality that complements that of the NFS Server section above. As with most YaST2 modules, the three main options are Add, Edit and Delete. Choosing Add brings up a subdialog to fill in all the blanks for an /etc/fstab entry for a network mounted filesystem (where the remote system is exporting the filesystem, and you're mounting it locally). First fill in the Host name of the NFS server, and that's easily done in most cases by hitting Choose, which brings up a list of hosts on the local network by hostname (if provisioned by a local DNS server, as most of my systems are), or by IP address (as the local SuSE installation is shown, since it's not part of my permanent network). The remote filesystem entry is one of the names of exported filesystems from the server, with a leading '/'. Mount point (local) is hidden by the dialog in the screenshot, but it's merely a place in the local Linux directory tree where you have created a mount point - before starting this module, I typed
 mkdir /mnt/homes to make a spot for the exported filesystem. Defaults are usually sufficient for the mount options, but you may want to add ro (for readonly), or user (to allow "normal" users to mount and unmount the NFS partition. There are other options: type man fstab for lots more info.
|
/etc/fstab Notes -
If you read my pages with much regularity, you'll know that /etc is the place in a *NIX directory tree where most of the system's configuration files are kept. One of the important ones is fstab. This is short for FileSystem Table. It lists which partitions are mounted where, roughly like describing the various drive letters where physical and virtual (network) devices are configured in a Windows environment. The good news is that this is an easily comprehensible ASCII file.
/dev/sda7       /       reiserfs        defaults 1 1
/dev/sda5       /boot   ext2    defaults 1 2
/dev/sda6       swap    swap    pri=42 0 0

/dev/cdrom      /media/cdrom    auto    ro,noauto,user,exec 0 0
/dev/cdrom1     /media/cdrom1   auto    ro,noauto,user,exec 0 0
/dev/fd0        /media/floppy   auto    noauto,user,sync 0 0

devpts  /dev/pts        devpts  defaults 0 0
proc    /proc   proc    defaults 0 0
usbdevfs        /proc/bus/usb   usbdevfs        defaults,noauto 0 0

garcia.orbdesigns.com:/homes    /mnt/homes      nfs     defaults 0 0
Each line is a mount specification, listed by device, then mount point, filesystem type, mount options, and the final two numbers reflect whether the filesystem should be dumped (a form of backup) or not, and the order in which filesystems are checked at bootup time. The first group of three are all hard disk partitions, the second group are the removable media devices. Next come assorted virtual filesystems for virtual terminal, system information and modification, and USB, respectively. Finally, there's a solo NFS mount specification, as I just configured it in the NFS Client module of YaST2.
It's fairly easy to get used to modifying the ASCII configuration files directly, but in order to safely and effectively maintain your system, there's an awful lot to know. The nice thing about YaST2 is that all of the functions are gathered and presented to you for ease of use and understanding. Be aware that there isn't ALWAYS a GUI tool for the job, and you'll have to figure something out, someday, and use a text editor to make it work. It's nice to have options, though.
|
Routing is an odd standalone YaST2 module. Odd in that it's the same sub-dialog that appears in both the Basic Network and Advanced Network Configuration modules. So I won't bother describing it again. Instead, let's talk about routing a bit. For most home and small business networks, DHCP or even simple static addressing schemes serve the requirements nicely. However, when you scale to more than one local subnet, either for bandwidth allocation or physical resource or IP address space reasons, then you will need more than one route setup. Usually multiple routes are only setup on machines that are designated as gateways. If your machine lives on two networks, however (say, by having two NIC interfaces, one configured for the 192.168.1.x network, and the other for 10.0.0.x, then you'll want to setup a new route so that 10.0.0.x machines are accessed through the appropriate interface, and all of your other out of network requests go to the default gateway. Read more by typing man route. Oh, and don't blindly experiment on a remotely located box, you can use route to break a box's connectivity.
Software :: Hardware :: Network/Basic
Network/Advanced :: Security and Users :: System :: Misc ::
All Content Copyright © 1999-2001 Brian P. Bilbrey.


 This, like all the other ODTL reports, is a purely personal and subjective report of my experiences with the software and/or hardware in question. If you try this at home, your results may match mine exactly. Alternatively, following these steps might make the neighbor boy start sleeping with sheep, cause your toaster oven to become Internet-connected, (then be hacked by some kid in Pasadena who lights your house on fire with it), and finally, may turn your low fat milk sour and chunky just as you raise the carton to your lips. YMMV, Caution Advised.