Software :: Hardware :: Network/Basic
Network/Advanced :: Security and Users :: System :: Misc ::
System
 Bootloader configuration is a module that provides a front end for the Lilo bootloader. What's a bootloader? Well, it's the bit of code at either the very front of a hard disk or at the beginning of a bootable partition (explicitly the first 512 bytes) There's enough code there to tell the system how to go load the rest of an operating system from there, optionally with user selection of which operating system (or version). Most bootloaders are two stage - the 512byte boot block tells where from and howto load the second stage, from somewhere else on the disk. The only purpose of the first stage is to be found in the right place. Lilo has hardcoded first and second stage boot loaders. This means that you have to re-run lilo after making any changes to it's configuration. That's the big advantage that this configuration tool brings to the table - after you've added a boot stanza, or modified some other aspect, click on finish to first test the new configuration, then reinstall Lilo. Adding new stanzas is easy, just type in a label, set the kernel to boot from a list of files found in /boot/, and choose the root partition from a pull down list. Create advanced settings by adding items to the list, and select valid options from a pull down list. The tool is like having a handy reference of the lilo.conf manpage open when editing it by hand. Kudos to SuSE for this one.
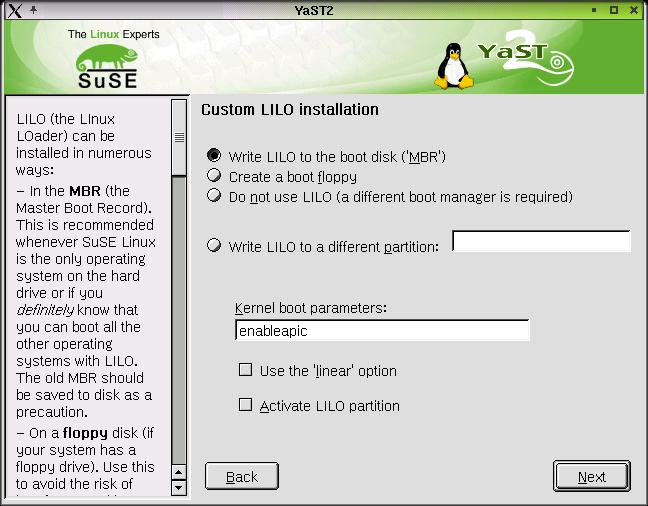
 Configure boot mode presents still more, yet less used, options both for installing lilo boot block, a few additional lilo options, and some invocation parameters. Again, make changes here and choose next to reinstall lilo with the changes. I'm not quite sure why this doesn't just get overlapped completely by Bootloader configuration and Create a boot...floppy. Odd, that. We can select from among four Lilo targets: MBR, Boot floppy, No Lilo, and selected partition. Then boot options can be manually put into the Kernel boot parameters field, and check boxes enable using the 'linear' option (for old BIOSes with newer, larger hard drives), and lastly, Activate Lilo partition. This can be useful, as some BIOSes will only boot the "active" partition. OTOH, if you're doing that, then why not load Lilo in the MBR. Mmmm. This tool is really legacy, after the previous module.
 LVM is the module for, surprise, working with the Logical Volume Management tools that come with the recent 2.4.X kernels. Ahem. Working is perhaps a bit too strong a term. How about horking the system beyond all reasonable recognition. How about breaking fstab so that the system doesn't boot properly, and unless you REALLY know what you're doing with remount options, it's reinstall time. How about, with the executable path that's available when YaST2 is run with root privileges by a normal user, the lvm utility programs aren't visible to the module, and it dies, badly, leaving config files in a real state. Whew.
Aside from telling you that if you want to get something done, instead of fool around with a broken GUI tool, then RTFM on LVM, and use the tools manually from the command line, you can see from that screenshot that after many trials and tribulations, I managed to actually bond three additional (virtual) drives into a single virtual partition that I could mount, as this listing shows:
bilbrey@gerlling:~> df
Filesystem           1k-blocks      Used Available Use% Mounted on
/dev/sda7              4787184   2665088   2122096  56% /
/dev/sda5                15493      3640     11053  25% /boot
/dev/test/test         6082368     32840   6049528   1% /mnt/test
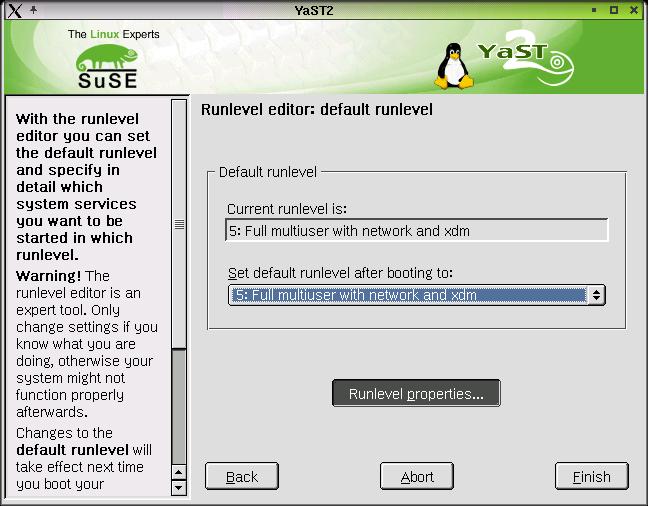
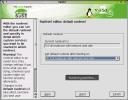 The Runlevel editor module, providing a pleasant contrast, is a cleanly interfaced, well-mannered, easy to understand tool. The initial screen, shown at right, displays the current runlevel, provides a simple pull-down list to select the new level to run at (when the machine next is booted). You're permitted to select from runlevels 1, 2, 3 and 5. This is good, since runlevels 0 and 6 are used for shutdown and reboot, respectively - not something you want to see, unless you want to boot cycle your machine, continuously. Setting the runlevel here modifies the file /etc/inittab. In every Linux distribution I've worked with, near the top of that file is a line that reads something like this:
 id:5:initdefault: There's our runlevel 5 setting, neh?
|
What are runlevels?
That's a good question. Fundamentally, we need to remember that there are a variety of ways in which Linux can operate. The main modes were listed by number above. These are:
- 1: Single user mode
- 2: Local multiuser without remote networking
- 3: Full multiuser with networking
- 5: Full multiuser with network and xdm
As previously noted, modes 0 and 6 are for shutdown and restart, and mode 4 isn't used. Generally speaking, most people will select to run with either mode 3, which is everything but the X-Window system, or mode 5, which starts X at boot, and proffers a GUI login screen. Note that you can login to a system in runlevel 3, then manually start X by typing startx at the command prompt. I do this on my systems, so that if I manage to misconfigure X (which I play around with on occasion), I don't get caught in a broken loop of X attempting and failing to start. Single user mode is generally reserved for deep system administration, very little is running besides the actual OS. Runlevel two is useful for doing some forms of configuration prior to putting a machine up live on a direct internet connection.
|
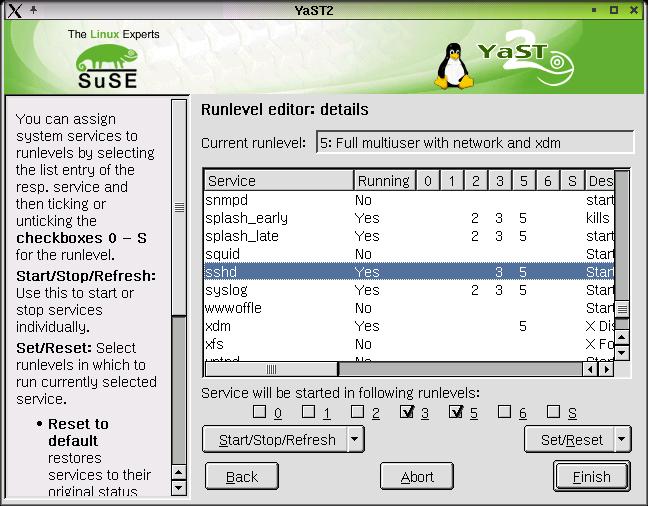
Once the runlevel is set properly (I'm leaving this one at 5, since the purpose of this install is to look at GUI tools), Select the Runlevel Properties... button to bring up the Runlevel editor: details dialog, shown at left. Briefly, nearly all services, both local and public, are started or stopped by script files that are found in /etc/init.d (At least in SuSE. They're in /etc/rc.d/init.d on a Red Hat box, but that's not our concern.) Also in that general vicinity, you'll find directories with names like rc1.d, rc2.d and so forth. These contain files that are symbolic links to the actual scripts in init.d
What's the purpose of that? Well, first, let's look at a directory listing of (for sake of brevity) a small part of runlevel 5:
gerlling:/etc/init.d/rc5.d # ls -al
total 7
drwxr-xr-x    2 root     root   3880 Jan 17 20:41 .
drwxr-xr-x   11 root     root   2283 Jan 11 22:17 ..
lrwxrwxrwx    1 root     root      8 Jan  9 10:55 K03squid -> ../squid
 ***
lrwxrwxrwx    1 root     root           10 Jan  9 10:34 S05network -> ../network
 ***
lrwxrwxrwx    1 root     root            7 Jan  9 10:40 S08sshd -> ../sshd
 ***
The '***' indicates omission. There are some salient features to the naming of these dynamic links. They're links because you don't want to have to maintain or update multiple copies of a single script. Instead, maintain the master, and point to it where ever necessary. Back to names, though. The booting box, once it's determined which runlevel to start in, goes into the appropriate rcN.d directory, and executes every linked script, with some interesting features caused by the link names. With all the Kxxx links, the linked script is run with a stop argument (K for Kill). All of the Sxxx links are run with a start argument. 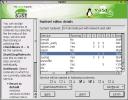 Now, if that wasn't cool enough, the numbering that follows the leading K or S guides the order of execution. For instance, you don't want to try to start and mount NFS partitions, or SSH, before the network's going, right? That's why, in the listing above, S05network is run before S08sshd.
Now, this relates to the Runlevel Editor: Details dialog quite clearly (thumbnail at left). In each runlevel, each listed service is either started or killed. The advantage of using this GUI is that the services are listed by name in alphabetical order, rather than ordered by S or K followed by some numbers as we find in the directory listings. Much easier to work with. Additionally, this tool can be used to Stop selected services (or start them) immediately, without waiting for the next boot cycle. That's very handy, as you don't want to have to reboot just to enable (or disable) DHCP, for instance. This isn't a Windows box, for goodness' sake!
Select keyboard layout is identical to that during installation. It offers several regional choices, as well as Dvorak. Below is a test field to confirm that the keyboard selection interprets the keycodes correctly. Funnily, the help is written specifically as though this module is only called during intial system installation, because it prefaces the next step during installation, timezone (which we're NOT looking at next)
Choose language presents a scrolling selection box with all of languages that are supported by SuSE Linux. Note that this is exactly as effective as the l10n (localization, with 10 letters between the 'l' and 'n') and i18n (internationalization, to the same paradigm) support for many of the individual packages. That is, each software package has a maintainer, or a development group, and they need to not only develop their code, but also attempt to get their documentation, help, menus and more, in as many languages as they can. With thousands and thousands of software programs available for Linux, many aren't very fluent in languages other than those native to their developers (and sometimes not even that much - documentation often drops to the bottom of the to-do list, below bug killing).
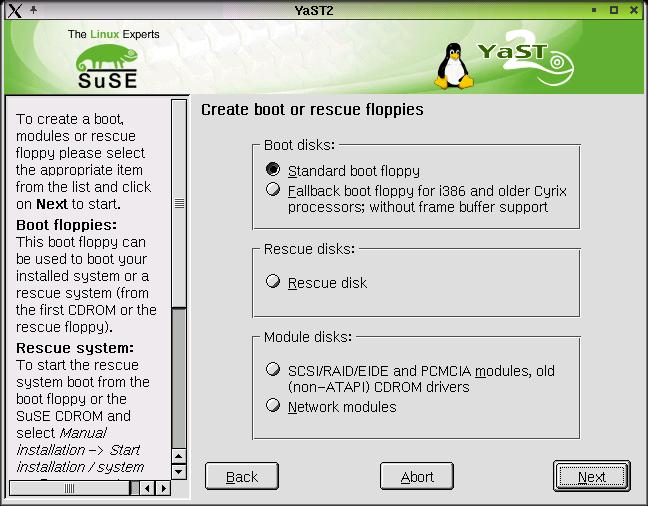
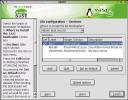
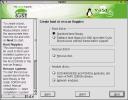 Create a boot, rescue or module floppy starts out by prompting you for the first CD in the installation set. Once in and read, the dialog shown at right is displayed. This offers the opportunity to create one or more of the following disks:
- Standard Boot Floppy
- Fallback Boot Floppy for i386 and Cyrix...
- Rescue disk
- Module disk: SCSI/RAID/EIDE and PCMCIA, old CDROM
- Module disk: Network modules
My temptation is to make all but the Fallback boot floppy (if your machine is listed for that option, you'd make that, as well. After selecting the radio button for the selected disk to make, click on the Next button. You're prompted to put in a preformatted disk (oddly, it doesn't say what TYPE of preformatting. One must figure that they mean DOS preformatted, since I've not seen EXT2 preformatted Maxell, TDK or any other brand of floppy. Mmmm. Putting on my assumption hat, preformatting only indicates the greater likelihood of error-free media, the better to do a block-by-block copy of a 1.44 MB disk image. The formatting isn't used at all, methinks. Choose next to begin the copying process. I listen carefully during floppy operations. If I hear the rapid back and forth grinding of retries, then I discard the diskette and start over, on general principles.
When completed, a notification is shown, I presume either for success or failure, although I've only seen the former. Click OK to clear that notice, and unfortunately, it closes the module. Generally, I want to make all of my boot, rescue and modules disks at once, and would appreciate the module not closing until I say I'm done. So, anyway, reopen the Create... module to build the other diskette images.
Yes, this assumes that you have a floppy drive in your system. More and more boxen don't these days. In most circumstances, you can use the CDROM drive and disk one of the installation set as a rescue tool, but I *like* having floppy backups for that, just in case!
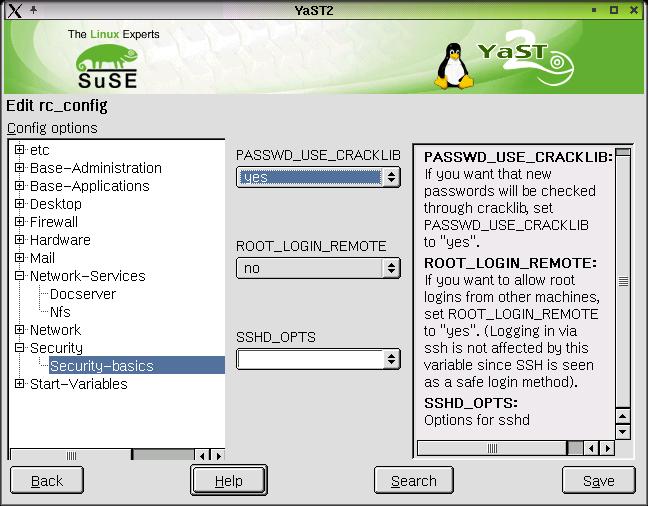
RC-Config Editor is a GUI tool that uses pulldown lists to create valid settings in the central SuSE configuration file, /etc/rc.config. Here's an excerpt from that file:
...
#
# This language is used in YaST. This is also the default
# for local users, if RC_LANG and RC_LC_ALL are not set. Root
# uses this language if ROOT_USES_LANG is set to "YES". You
# can find this variable in /etc/rc.config.d/lang.rc.config.
#
DEFAULT_LANGUAGE="english"

#
# Some people don't want SuSEconfig to modify the system. With this
# entry you can disable SuSEconfig completely.
# Please don't contact our support if you have trouble configuring your
# system after having disabled SuSEconfig.  (yes/no)
#
ENABLE_SUSECONFIG="yes"

#
# SuSEconfig can mail reports (created by YaST or included in packages)
# to you.  Here you can set the address.  If you don't want reports to
# be sent, then simply set it to "".
#
MAIL_REPORTS_TO="root"
...
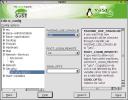 It's actually a fairly well documented and useful file on its own, without any GUI to front for it. As you can see from the dialog shot at left, the YaST2 module does provide some logical groupings to help an administrator find the correct setting, and offer (in most cases) the correct set of options to choose from. I say, in most cases, because I found one or two items where there was a blank field to type into, and nothing to indicate what options were valid, and no context help. This is true of the enigmatic SSHD_OPTS, also in the screenshot. That's no good at all.
Also, it's important to note that this central rc.config file is, so far as I know, unique to SuSE Linux. The contents of this rc.config file are applied to individual configuration files for specific programs and/or services all over the system by use of the /sbin/SuSEconfig program, which is automatically run when exiting the RC-Config editor YaST2 module. If you edit /etc/rc.config manually, you need to manually run the SuSEconfig to apply the changes. Setting a goal of understanding what each of the settings in rc.config is, where the setting is applied and the effect it has is a good method to gaining a mastery of the bones of your SuSE Linux system.
|
WAY Cool feature!!!
One of the things I am resigned to is occasionally mis-typing a directory name in a long string, and having to edit the path on the command line, or simply retype it (if it's short enough). This is because if you don't specify a correct file or path, Bash (the command interpreter) doesn't know where in the directory tree you mean. That's the cause of sequences like this:
garcia:~# cd /hom/bilbrey
bash: cd: /hom/bilbrey: No such file or directory
garcia:~#
Virtually by accident, I mistyped something while looking for the rc_config file, and when I hit enter on cd /etx, I didn't even notice that the cd command worked, even though I hadn't typed the correct path. A double take or two later, I noticed, and ran the following test:
gerlling:/etc # cd /hom/bilbrey
/home/bilbrey
gerlling:/home/bilbrey #
Wow. I mean, WOW!!! Now typing the right thing is good. But this is stellar! I don't know what the algorithm is, and I haven't found any documentation to support this feature. Dave Farquhar wrote about the joys of tab completion of paths recently, and that's a great tool. But this is great. Doesn't work on everything. You have to be pretty close. For instance, cd /hom/bilby fails, while cd /hom/bilbry works. Some distance algorithm at work, no doubt. Woo Hoo!
|
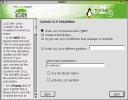
Select kernel is a module that I didn't spot during installation. In hindsight, I'd have expected to see it there, and not here. The sidebar help in this module states: Choose the kernel to use for the installation, and later in the installed system. Select next to start the update. The options are:
- Standard kernel 2.4 (pentium optimized)
- Kernel 2.4 built for i386 (use for 486 also)
- Kernel 2.4 with SMP support for older processors
- Kernel 2.4 with SMP support
- Kernel 2.2 with SMP support
The standard kernel's good enough for most purposes. The actual version is 2.4.10, presumably with an assortment of patches to enhance stabilty, performance or other features. Almost no distributions use stock Linus kernels. Heck, I don't!
Select time zone presents a standard scrolling list of timezones, as well as a GMT vs. localtime pulldown choice for the setting of the hardware clock. This is one of those things only used in a laptop on the road, or if you move your machine. Otherwise, why bother?
Software :: Hardware :: Network/Basic
Network/Advanced :: Security and Users :: System :: Misc ::
All Content Copyright © 1999-2001 Brian P. Bilbrey.


 This, like all the other ODTL reports, is a purely personal and subjective report of my experiences with the software and/or hardware in question. If you try this at home, your results may match mine exactly. Alternatively, following these steps might make the neighbor boy start sleeping with sheep, cause your toaster oven to become Internet-connected, (then be hacked by some kid in Pasadena who lights your house on fire with it), and finally, may turn your low fat milk sour and chunky just as you raise the carton to your lips. YMMV, Caution Advised.